
The Short Answer
- The AAP recommends keeping your baby in a separate sleep space in your room for at least the first six months.
- Three setups cover nearly every bedroom: sleep-only (bassinet plus diaper caddy), sleep-plus-changing (add a compact dresser), and nursery nook (a defined corner with storage).
- Measure your usable floor area before ordering anything. Subtract your bed footprint, door swings, closet access, and vent zones from the total square footage.
- The bedside essentials are short: a safe sleep surface, diapers and wipes, one spare onesie, a burp cloth, and a low-lumen nightlight.
- A full-size changing table, nursery glider, and decorative shelving can wait until the baby moves to a separate room.
A bedroom nursery in three layouts covers nearly every home situation: sleep-only, sleep-plus-changing, and nursery nook. The AAP recommends keeping your baby in a separate sleep space in your room for at least the first six months, so a bedroom nursery isn’t a workaround or a fallback. It’s the recommended setup for most newborn families. Every layout in this guide starts with the same step: measuring your usable floor space before you buy anything.
Start With the Numbers: Measure Your Bedroom Before Buying Anything
Your bedroom’s listed square footage isn’t your available floor area. Start with what’s left after you account for your existing furniture and the paths you actually walk. Subtract the full footprint of your bed and nightstands. Then mark out the arc of your bedroom door, the swing of your closet, and any bi-fold panels. Add a buffer around heating vents, radiators, and air-conditioning units, which shouldn’t have furniture placed directly in front of them.
What remains is the space you can actually use. A standard full-size crib needs roughly 54 by 30 inches of floor space plus accessible clearance on at least two sides. A bassinet takes up considerably less, typically around 36 by 20 inches, which is why it’s the practical choice for a shared bedroom in the early months. A compact dresser with a changing topper adds roughly 36 by 20 inches plus working room in front for diaper changes.
Before ordering anything, mark furniture footprints on the floor with painter’s tape. Walk the room in the dark, open every door and drawer, and confirm you can reach the sleep space from your side of the bed without stepping around obstacles. If that path feels awkward in a daytime test run, it’ll be worse at 3 a.m. with a crying baby.
Layout 1: Sleep-Only Setup for the First Six Months
The sleep-only setup fits almost any bedroom and requires only a bassinet or compact play yard, a small diaper caddy, and a low-lumen nightlight. Position the bassinet close enough to your side of the bed that you can reach the baby without fully standing. According to Mayo Clinic room-sharing guidance, placing the infant sleep space near but separate from the parents’ bed is what makes room-sharing actually work.
Beside the bassinet, keep a small diaper caddy stocked with diapers, wipes, a burp cloth, and one or two spare onesies. A low-lumen nightlight lets you see during night feeds without waking yourself or a partner fully. A washable changing mat on a low dresser surface or the floor handles diaper changes without a dedicated table. That’s the whole setup.
What this layout doesn’t need: a second dresser, a dedicated changing table, a glider, or decorative shelving. Store backup diapers, extra clothing, and seasonal items in a closet or in labeled under-bed bins. The bedside zone should hold only what you’ll reach for tonight, nothing else.
Layout 2: Sleep Plus Changing Station in the Same Bedroom
A compact dresser with a changing topper adds a full diaper-change station to the sleep-only setup when your bedroom has eight to ten additional square feet along a wall. Place the dresser so the changing surface faces into the room rather than toward a wall, giving you full access from both sides during a change. Keep the bassinet within arm’s reach of your sleeping position and the dresser within a few steps.
Organize the dresser top with a changing pad locked into a topper rail, a small basket for diapers and wipes, and a lidded bin or laundry bag for soiled items. The drawers hold folded onesies, sleepers, and swaddles for the current week, with overflow in the closet. This layout cuts down on nighttime steps and keeps the room functional for adults without crowding the floor plan.
One mandatory safety step for this layout: anchor the dresser to the wall before placing anything on or in it. The CPSC nursery safety guidance covers furniture anchoring and the use of safety straps on changing surfaces. Never leave a baby unattended on any elevated surface, even briefly.
Layout 3: Nursery Nook in a Small or Shared Bedroom
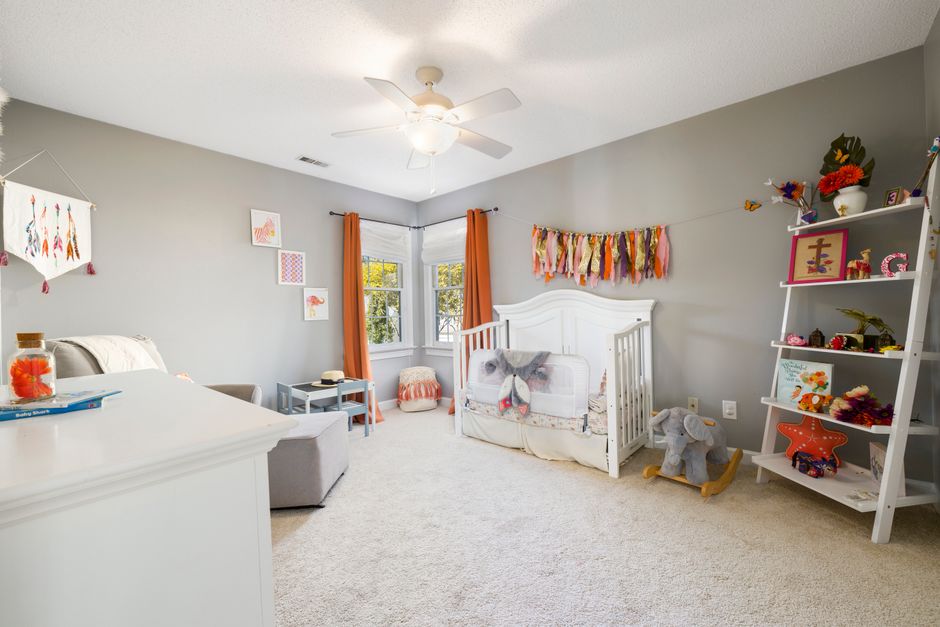
A nursery nook works well in a one-bedroom apartment, a narrow room, or any space where a separate baby room isn’t available. The goal is a defined corner or section of wall that holds the sleep space and a small amount of storage without taking over the whole room. A bassinet or compact play yard in one corner, a narrow shelf mounted above dresser height, and a hanging organizer on the inside of a closet door can carve out a clear zone without permanent changes or a large furniture footprint.
In a one-bedroom apartment, the closet itself sometimes becomes part of the nook. A reach-in closet with the doors removed or left open can hold a compact dresser, a hanging organizer, and folded supplies while keeping the main floor area open. The bassinet lives just outside the opening, near the bed. That keeps the adult bedroom functional and the baby zone contained without buying new furniture for every storage category.
As the baby grows past the bassinet stage, plan for a transition to a compact crib or full-size crib. The AAP guidance on infant sleep products emphasizes following each manufacturer’s weight and developmental limits. When picking where to place the nook, choose a spot with clearance for a crib later if you expect to continue room-sharing past the six-month mark.
What to Buy, What to Store, and What to Skip
The bedside essentials for a bedroom nursery are five items: a safe sleep surface, a diaper caddy stocked with diapers and wipes, a burp cloth, one spare onesie, and a low-lumen nightlight. Everything else either gets stored nearby for weekly restocking or waits until the baby has a room of their own. Most bedroom nursery checklists overload the sleep zone with things that belong in a separate nursery, not beside an adult bed.
| Item | Keep bedside | Store nearby | Skip until own room |
|---|---|---|---|
| Bassinet or compact play yard | Yes | ||
| Diaper caddy (diapers, wipes, spare onesie) | Yes | ||
| Low-lumen nightlight | Yes | ||
| Washable changing mat | Yes | ||
| Burp cloths (2 to 3) | Yes | ||
| Bulk diapers and extra wipes | Yes (closet or under bed) | ||
| Backup clothing and sleepers | Yes (closet or under bed) | ||
| Adult blankets and spare pillows | Yes (closet) | ||
| Full-size changing table | Yes | ||
| Nursery glider or rocking chair | Yes | ||
| Large bookcase or display shelving | Yes | ||
| Decorative baskets and bins | Yes |
Tip: Restock the bedside diaper caddy once a day, in the morning. Daylight restocking is faster and means you won’t run out at 2 a.m.
Safety Checks for a Bedroom Nursery Through 12 Months
The AAP rule for a bedroom nursery is room-sharing without bed-sharing: the baby sleeps in their own crib, bassinet, portable crib, or play yard in the parents’ room, not in the parents’ bed. The sleep surface must be firm and flat with no pillows, loose blankets, bumpers, stuffed animals, or any other soft items inside the sleep space. According to CDC safer sleep guidance, placing babies on their backs on a firm, flat surface with no loose bedding is a core safer sleep practice.
Placement within the room matters as much as the sleep surface itself. Don’t position the sleep space directly beside a window where blind cords and drafts are nearby hazards. Keep it away from heating vents, radiators, air-conditioning units, and any wall-mounted television. Don’t place it near a shelf or tall unsecured piece of furniture that could tip. Leave a clear walking path between the bed and the sleep space that you can navigate without turning on a light.
Before purchasing any sleep product, check the CPSC crib requirements for federal compliance standards covering full-size and non-full-size cribs and related sleep products. If you’re using a hand-me-down bassinet or portable crib, verify it meets current federal standards before putting a baby in it. An older product that doesn’t comply shouldn’t be used regardless of how it looks or how recently it was last used.
Key Takeaways
- The AAP recommends room-sharing without bed-sharing for at least the first six months. Build your bedroom layout around a separate infant sleep space from day one.
- Measure usable floor area before buying anything. Subtract the bed, door swings, closet access, and vent zones from the stated room size to get a real number.
- Three layouts cover almost every bedroom size: sleep-only (bassinet plus caddy), sleep-plus-changing (add a compact anchored dresser), and nursery nook (defined corner zone).
- Keep only tonight’s supplies at the bedside: diapers, wipes, one spare onesie, a burp cloth, and a nightlight. Bulk supplies go in a closet or under the bed.
- Anchor every tip-prone piece of furniture to the wall and verify that any sleep product meets current federal safety standards before use.
- A full changing table, nursery glider, and decorative shelving all belong in a separate room. Leave them off the bedroom list entirely.
The supplies you actually reach for at 3 a.m. are simpler than most nursery lists suggest: a safe sleep surface within arm’s reach, diapers and wipes, and a light you can switch on without waking everyone. Each of the three layouts in this guide is built around that core and scaled to fit a different amount of floor space. Once you know which layout matches your actual measurements, the setup typically takes a weekend and costs far less than a full nursery build. The furniture and gear that didn’t make the bedroom list will still be there when the baby eventually gets a room of their own.
Frequently Asked Questions
Can you set up a nursery in your bedroom?
Yes, and pediatric guidance actively supports it. The AAP recommends keeping a baby’s separate sleep space in the parents’ room for at least the first six months, so a bedroom nursery isn’t a workaround. It’s the recommended arrangement. The key is choosing a layout that fits your actual floor space rather than buying a full nursery set and working backward.
Where should the baby’s bassinet or crib go in the parents’ bedroom?
Place it close enough to your side of the bed to reach the baby without fully standing, but away from windows, blind cords, heating vents, and any tall unsecured furniture. Leave enough clearance to access the sleep space from at least two sides and to walk the room safely without turning on an overhead light. That path matters more than any aesthetic consideration.
Do you need a changing table in a bedroom nursery?
No. A changing pad on a compact, anchored dresser or a washable mat on a low, stable surface works just as well in a small room. The only firm rule per CPSC guidance is that a baby must never be left unattended on any elevated surface during a change. A full-size changing table adds floor area you rarely have to spare in a shared bedroom.
How much space should you leave around a bassinet or crib?
The commonly cited guideline is 3 feet of clearance on the sides you access most, with at least enough room on the remaining sides to lean in safely. For a full-size crib, that means planning for a footprint of roughly 54 by 30 inches plus the surrounding access area. For a bassinet, the footprint is smaller but the accessible path around it still matters for nighttime use.
How long should a baby sleep in the parents’ room?
The AAP recommends at least the first six months in the parents’ room in a separate sleep space, with continued room-sharing through the first year as an option. The transition to a separate room depends on each family’s space, sleep patterns, and the baby’s developmental stage. There’s no fixed deadline. Plan your bedroom layout with six to twelve months in mind so you’re not making the same decisions twice.
This article is for informational purposes only and does not replace professional medical advice. Always consult your pediatrician about your child’s health.